Newbies Guide to Movavi Photo Editor
by 21/04/2017 16:020

Movavi Photo Editor is a versatile photo editing software that comes with all the basic features for retouching your photos. When you open the software, you don’t have to click through menus to search for the function you want to use. All the photo editing features are found on the top bar in the forms of buttons. When you need to use a photo editing feature, you just select on the right tab and you will find all the relevant tools.
The crop tool in Movavi Photo Editor is a handy tool for cropping off the unwanted part from the photo for example blurred parts or any object that you don’t want people to see in the photo. Cropping a photo to become smaller can allows the subjects to become more prominent and thus making the photo looking more professional. You can custom define the size of the crop area or choose a ready defined preset to apply the cropping.
The Text tab provides all the basic text formatting tools such as text alignment, change font type and size, bold, underline and italic and text rotation. If you want to put some text on your photo, you must click the Add text button and a text box will be added onto the photo. After that, you can put the cursor in the text box and type in the text. You can add as many text box as you want on the photo by clicking on the Add Text button repetitively.
In the Rotate tab, you will find the rotate and flip tools. The rotate tool allows you to rotate the photo by 90 degrees to the left or right each time you click on the button. The flip tool allows you to flip the photo horizontally or vertically so that the photo look as if it has been inverted. The straighten tool under the Rotate tab will come in handy if your photo is crooked and you didn’t want to crop the photo to make the photo look straight. If you need help in straightening the photo, you can click the Level Tool and dotted grid lines will appear. You can move the angle slider until it matches the grid lines.
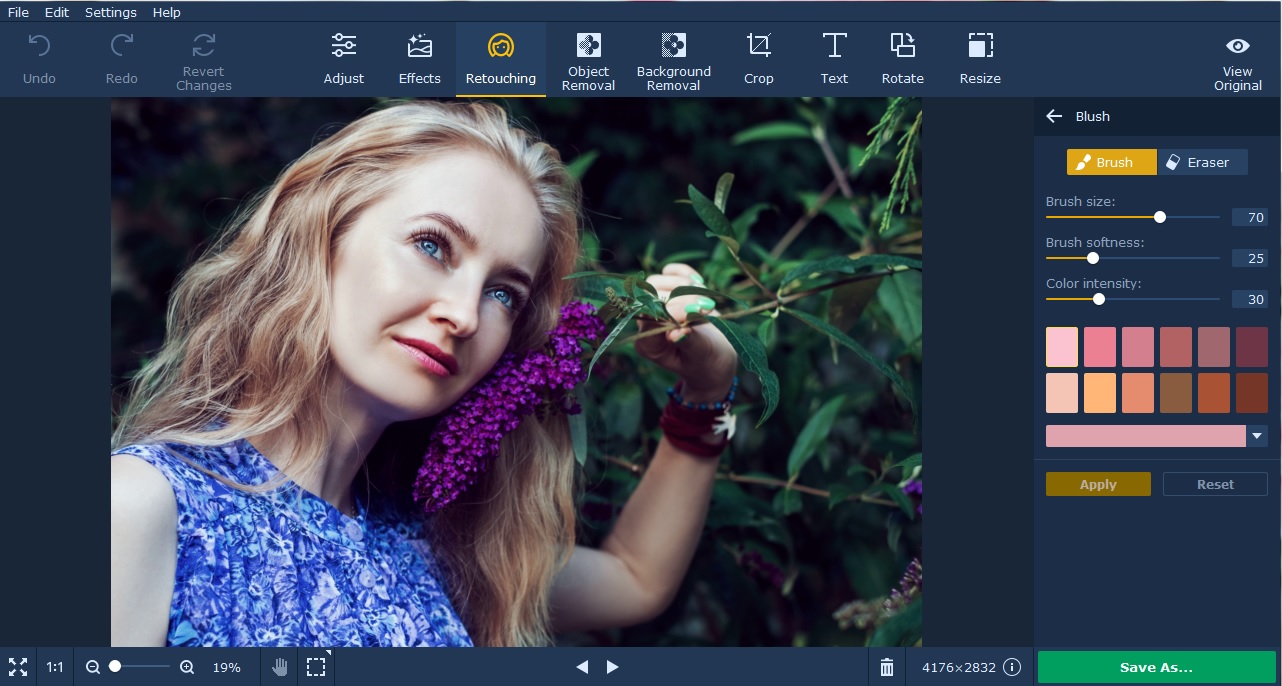
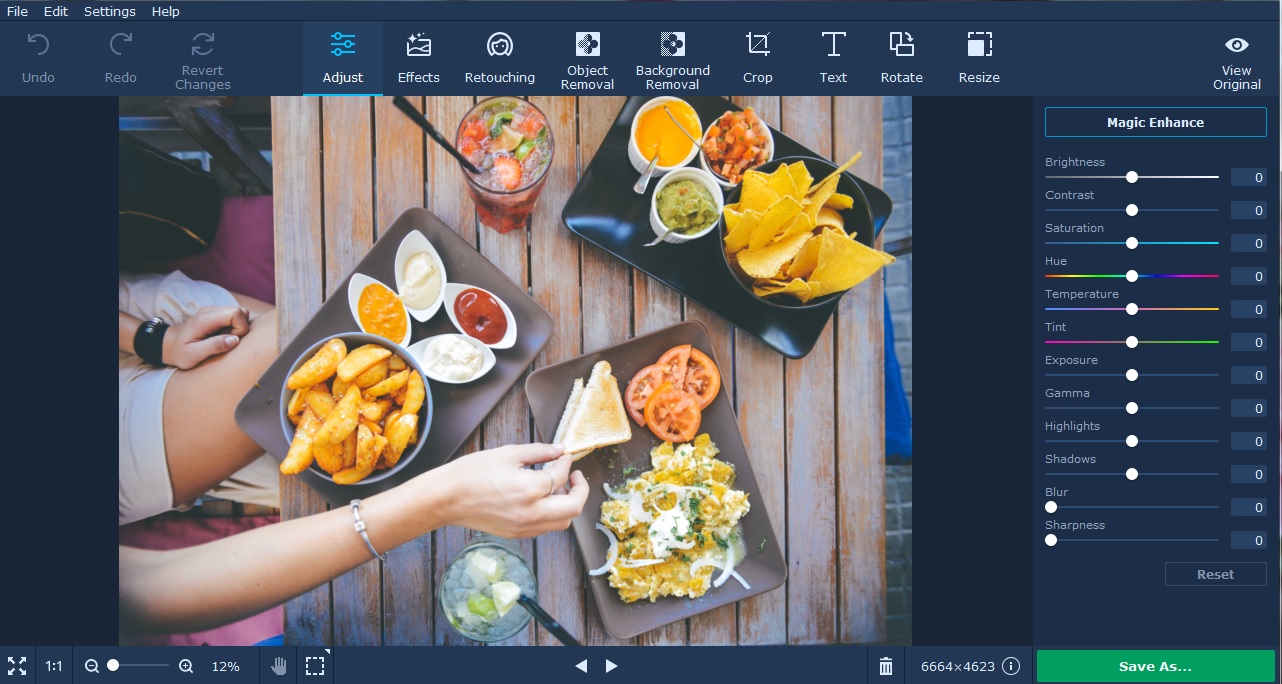
Under the Resize tab, you can resize your photo to the desired size by many methods including scale to width/height/percentage, or custom size. Movavi Photo Editor has a photo retouching tool that is useful for people who frequently work with portrait photos. You can retouch facial blemishes like pimples, and freckles with the tools in the Retouching tab. If your photo need slight enhancement, you can go to the Adjust tab and play around with the sliders to adjust the photo quality.
You can go to the Object Removal tab if you want to delete some unpleasant details in the photo. To get the best result, you must use the red brush tool and trace along the border of the unwanted object. If you mark the unwanted object properly, you will find the entire object being highlighted in red color. When you click the Start Erasing button, the unwanted object that is marked in red will completely disappear.
In the Background Removal tab, you can use the red marker to cross the unwanted background and the green marker to draw along the border of the subjects. A yellow border line will appear over the subject marked in green to show that it won’t be deleted. To delete the background, you simply select the Step 2 button and it will transform into a transparent background. You can always use the green or red brush tool to redraw the boundary if you did not mark the object correctly in the first time. You can always undo the changes so there is no need to reload the photo. When you are done editing the photo, the last step is to click the Export button and save it.
Related posts

Technology / by - ago
Yamaha R15: The Perfect Entry-Level Supersport for Indian Riders
Choosing a first supersport motorcycle can be hard for many riders. New riders usually look for a bike that looks sporty, has modern technology, and is easy to handle. The…

Technology / by - ago
How to Upgrade Your Front Porch to a Cosy Retreat
Your front porch is the first impression of your home, yet it is often overlooked as a space that can be both functional and inviting. With a few thoughtful upgrades,…

Technology / by - ago
Behind The Security Curtain: How QQWIN4D Ensures Safe Transactions Every Single Time
Do you want to know how QQWIN4D keeps each transaction safe in a simple and steady way? Many users think about this before they add funds, check account details, or…

Technology / by - ago
Can AI Replace Manual Testing? A Realistic Look at the Future of QA
Artificial intelligence is reshaping software testing faster than many teams expected. From generating test cases and analyzing requirements to detecting defects and maintaining automated tests, AI-powered tools are becoming an…